October 7, 2019
6 min read
Growing up in and around the film industry, Philip Wages initially did not want to become a cinematographer. During college, he was given a digital stills camera and began shooting photos primarily as a hobby. As he got more immersed in it, he began studying large lighting set-ups from movies and applied the techniques to still photos. Before he knew it, Wages began shooting corporate stills and videos for large brands like Coca Cola. He was happy working his way up to shooting commercials and print ads when a friend offered him the chance to shoot a movie, and Wages agreed to shoot it to his own surprise. Since then, he has gone on to shoot multiple long format projects, most recently being By Night’s End.
Directed by Walker Whited, By Night’s End is a dramatic thriller in which a couple wake up in the middle of the night to a man searching for something in their home. After they are forced to kill him in self-defense, they decide to take one hour before calling the police to search for what they hope is a hidden fortune. Wages shot the indie film with the EVA1 using unique lighting techniques in order to shoot quickly and efficiently, as well as exploiting the EVA1’s high ISO capability.
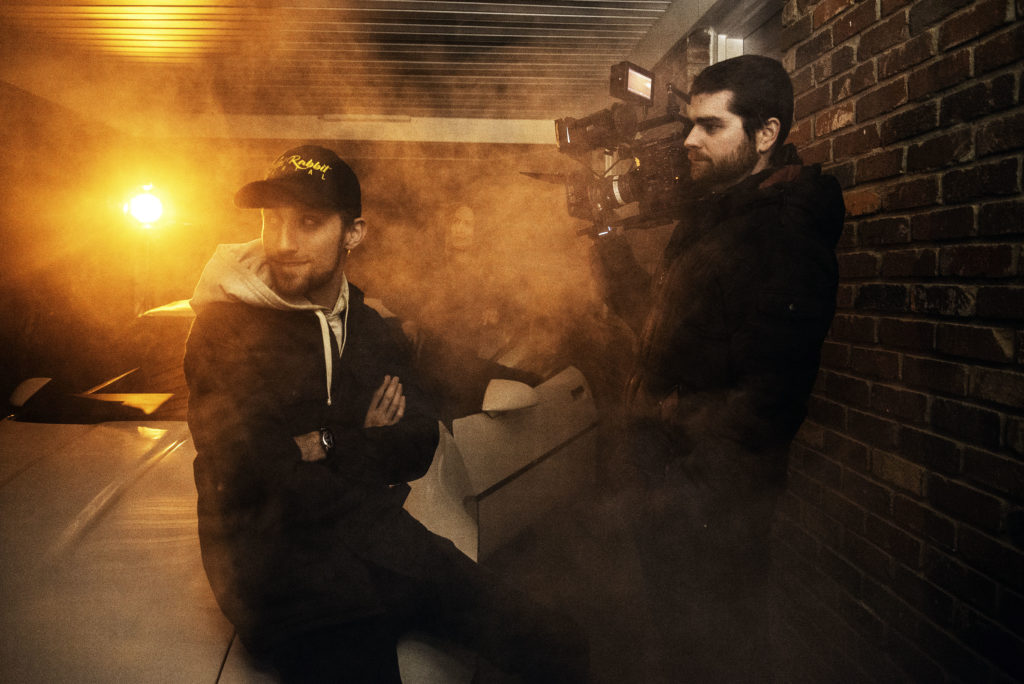
(Left to right): Director Walker Whited and DP Philip Wages on set of By Night's End, shot with the AU-EVA1.
Lighting For 360°
Wages’ biggest challenge for the low-budget feature was that the entire movie takes place at night, around one house, while it’s raining. “The issue, like on every movie, was that every scene had to look consistent throughout,” explains Wages. “However, on a typical narrative project, you change locations and therefore, returning to locations occurs on different days or times. It affords the ability to change the lighting dramatically. However, this project posed a unique challenge by taking place chronologically, in one night, in the same location. I needed to set up the rooms to film in any direction because you can’t shoot the same angles for an hour and a half without it looking boring.”
To accomplish this, Wages worked with production designer Ariel Kaplan and carefully placed practicals all throughout the rooms so that no matter what angle was shot, there was a bright practical in each background. “Basically, I’m letting the highlights define the shadows,” reveals Wages. “Having something bright in the background of each shot defines the rest of the space while also making it look natural. This ‘halo’ of practicals allows me to make the exposure a lot darker, which is fitting since the movie’s tonality is dark.”
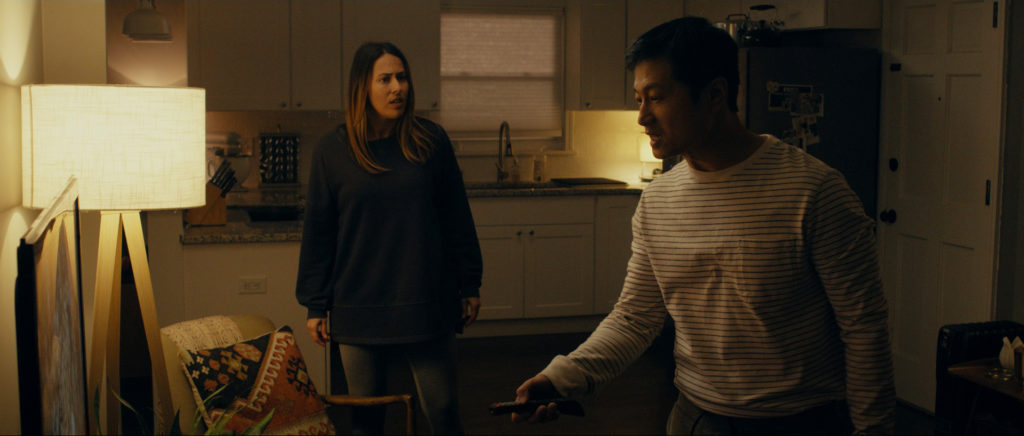
Wages carefully placed practicals all throughout the rooms so there was a bright practical in each background.
Wages exploited the EVA1’s native 2500 ISO feature so that he could work with practicals, as well as smaller light sources. For his practicals, Wages replaced the bulbs with LEDs and attached a dimmer to each unit so he could ride light levels. LEDs dim without a color temperature shift unlike incandescent. “When shooting coverage of character A, the lamp might be at 100% brightness as a key light. However, when you flip over to character B who is closer to the lamp, I could adjust the brightness to match exposure on the actor without changing the ambient light level of the room.”
The Teaser Effect
Because of the schedule and budget, Wages knew he had to work fast. A trick he learned from his father (Cinematographer William Wages, ASC) was to use Leko lights and bounce them off a teaser that was hanging from the ceiling. According to Wages, Lekos are theatrical light fixtures that can be shaped into squares and rectangles via internal light modifiers and are the only light capable of this level of precision. The teaser used in the film is two sided – a white side and a black side. The white side faces the camera, and using the Leko’s built-in light shaping tools, Wages could focus the light to only fill the teaser. “This teaser effectively gives a really soft, giant backlight while keeping the actual light fixture behind the camera,” says Wages.
According to Wages, the traditional way of lighting with the same effect would be to use a wall spreader – a pole that pushes up against two walls that you mount lights on. “Another added benefit to the teaser is it is faster and safer to rig off the ceiling, and it is quicker to reset for close-ups,” explains Wages. “Lighting with the teasers in conjunction with all my practicals that I’ve placed around the room, I can now key it from anywhere we want, and those practicals trick the viewer into thinking they’re lighting each scene. It’s a sleight of hand.”
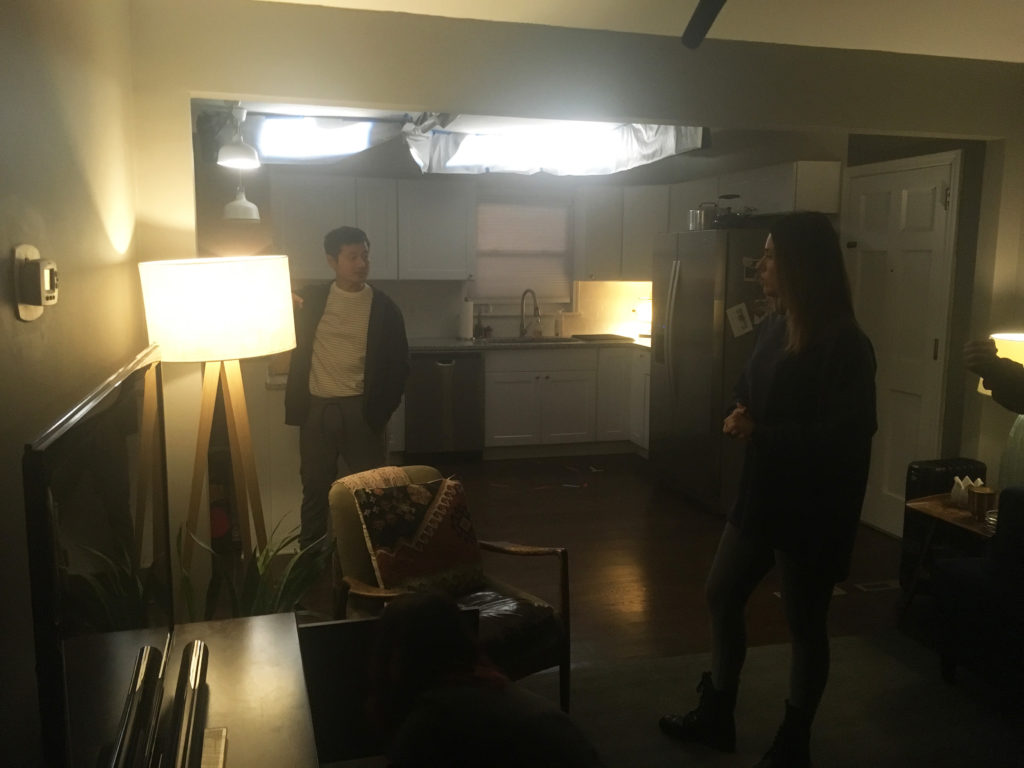
Wages rigged "teasers" off the ceiling and bounced Leko lights into them to create a nice backlight.
The Power of EVA1
For By Night’s End, Wages captured 4K DCI (4096x2160) ALL-I 400-Mbps at 23.98-fps cropped in the 2:35:1 aspect ratio. Wages and Whited felt the 2.35 aspect ratio was a practical solution for the house. “We chose a small house because we wanted it to feel claustrophobic and feel like the enemy is pressing in at all times. In addition, when you’re lighting off the ceiling, you need to hide the ceiling. The widescreen ratio gave us the room we needed as well as helping with the claustrophobic feel of the movie,” notes Wages.
Wages did extensive testing in pre-production to see how far he could push the EVA1. When he found noise in the image, he applied Neat Video noise reduction and found that it didn’t alter the image. For some night sequences, Wages captured sky detail at 5000 ISO. “It sometimes was too much, but again I’d rather have too much information than too little information.”
For one scene, Wages had a three to four minute single shot at night that starts on the back porch, follows the actress around the house, looks inside windows, goes inside the house for dialogue, and then concludes with a stunt outside. “That shot posed many problems because we needed to see 360 degrees outside with rain,” reveals Wages. “We had to lean on the higher ISOs of the camera in order to get the shot. We utilized a deep t-stop in order to see the environment as our female lead makes a plan for the climax of the movie. There are very few cameras that are capable of pulling off this shot, but they would’ve been too heavy.”
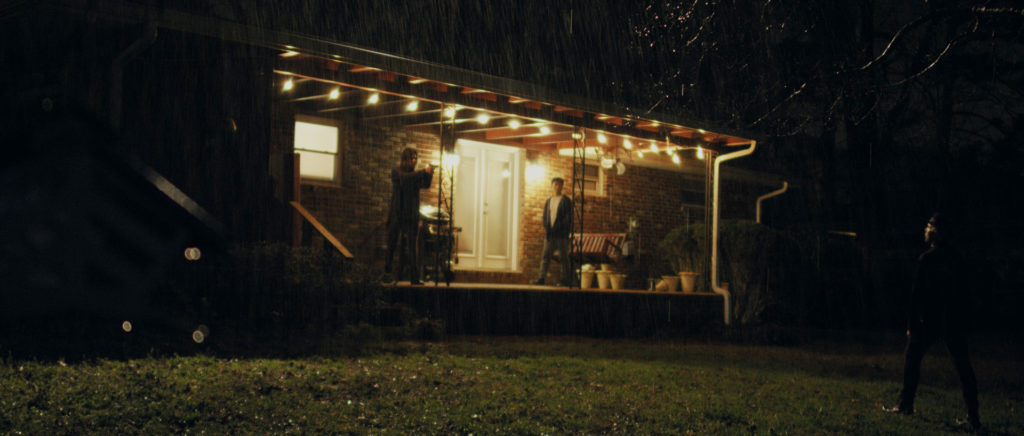
One of Wages most difficult shots involved a four minute single shot at night where he needed to see 360 degrees outside with rain. He relied on the higher ISOs of the EVA1 to get the shot.
Post Consistency
By Night’s End is currently being posted at W² Media in Atlanta, GA with colorist Sean McCane. During pre-production, Wages wondered if the $8,000 camera could sustain an entire feature film. “I asked Sean if there were any issues so far,” says Wages, “and he replied that the EVA1 footage ‘behaves like footage from the big boys. According to Wages, the look of the film was set in pre-production. “We created a LUT that slightly desaturated, pulled our exposure down one stop, and made the footage slightly warmer. This gave us a really strong negative that could be manipulated well in post. When we started to do our final grade we pulled together all of the different monitors available to us. One of our main goals in the final color grade was to create a durable image that looked good on any screen.”
To achieve this, Wages explained they used a wide range of monitors, including professional monitors from W², his own Atomos Shogun Inferno, a Panasonic professional 17-inch monitor, and two TVs. In the beginning, there was some inconsistency among the different monitors with which Wages was not pleased. McCane decided to push the orange from the sodium vapor light outside the windows. “Pushing the orange and saturation made the image very consistent across every monitor,” Wages explains. “It looks intriguing with more color to it. I’m really pleased with the way it’s turning out.”
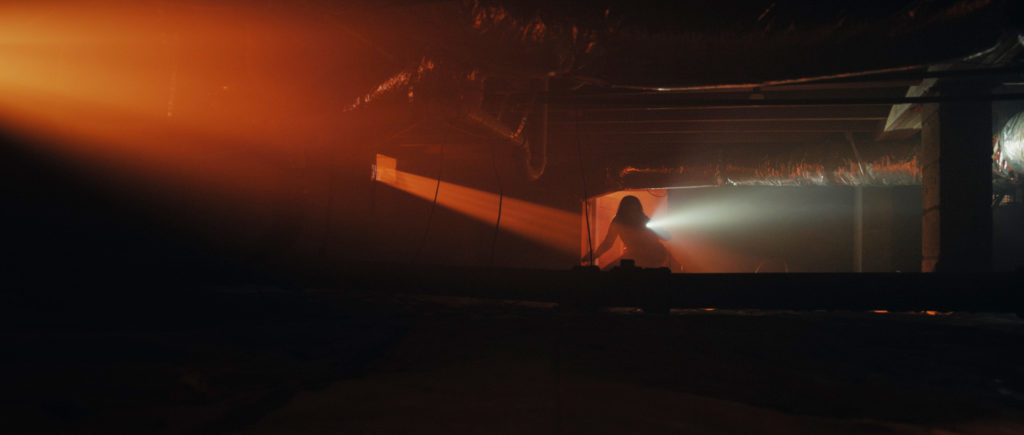
In post, Wages and his colorist, Sean McCane, decided to push the orange from sodium vapor light outside the windows to be consistent on any screen they used.
For more information on By Night’s End, visit here.
Visit Philip Wages’ website at www.philipwages.com.
To learn more about the EVA1, visit here.
![]()
